From Install to First Inspection
A nine-step walkthrough of how Sentinel works once it's running on your machine — built around the bundled VisA PCB1 sample so you can follow along on a fresh install.
Sentinel is a tray application with a browser-based UI. After installation, the workflow is the same regardless of your product: pick a reference image, mark what to inspect, label some good and bad samples, train, and deploy. The pages below mirror the in-app sidebar — Templates, Datasets, Models, Inspection.
See Sentinel in action
A short visual walkthrough of how Sentinel works end-to-end — from launching the tray app to running your first inspection on the sample dataset. Use the timeline to skip ahead, or download the file to watch offline.
Take this guide with you
Full PDF version of the Getting Started manual — same workflow, with extra screenshots and parameter reference tables. Available in English and Hungarian.
Launch Sentinel from the system tray
Sentinel runs as a background service. After installation it adds a tray icon next to the Windows clock. There's no main window — right-click the icon and choose Open Sentinel to load the UI in your default browser at http://127.0.0.1:8000.
- First start takes 10–30 seconds while the embedded server initialises
- Optional auto-start at login during install
- Reachable from other devices on the same network at http://<host-ip>:8000
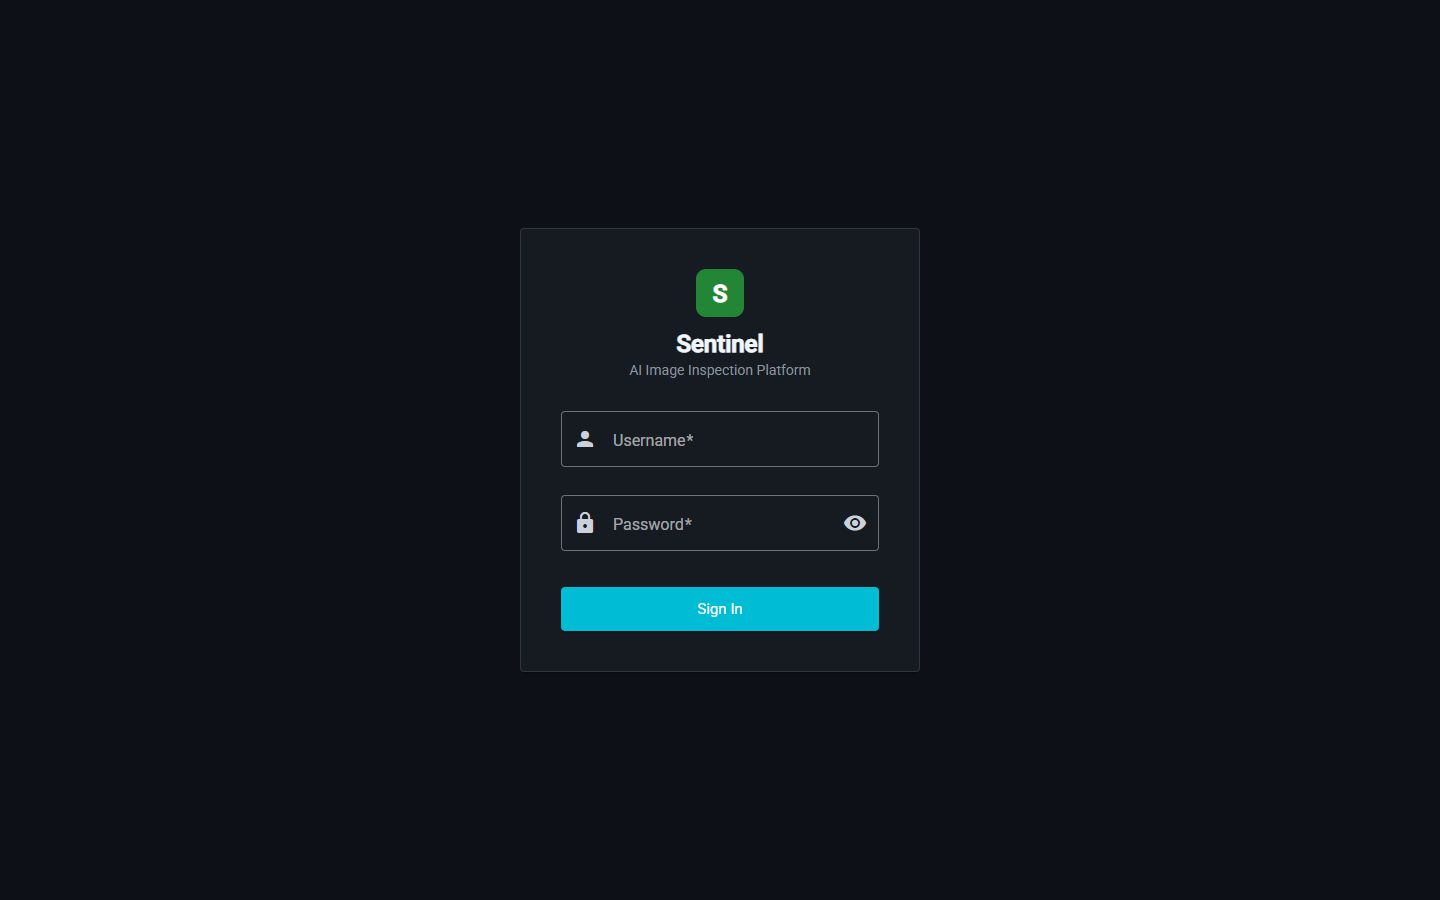
Log in with your account
Default credentials on a fresh install are admin / admin. Change the password immediately under Admin → Users after first login. Sessions use JWT access tokens with automatic refresh.
- Default admin credentials shipped with first run only
- JWT access + refresh tokens (24-hour access lifetime)
- User management with role-based admin / operator separation
Get oriented on the dashboard
After login the dashboard shows a system overview and a quick-start guide. The left sidebar is your main navigation — Templates, Datasets, Models, Inspection — and that's the order you'll work through them.
- System monitor: CPU, GPU, disk, queue length
- Quick links to recently active templates and models
- Live training queue panel with progress and ETAs

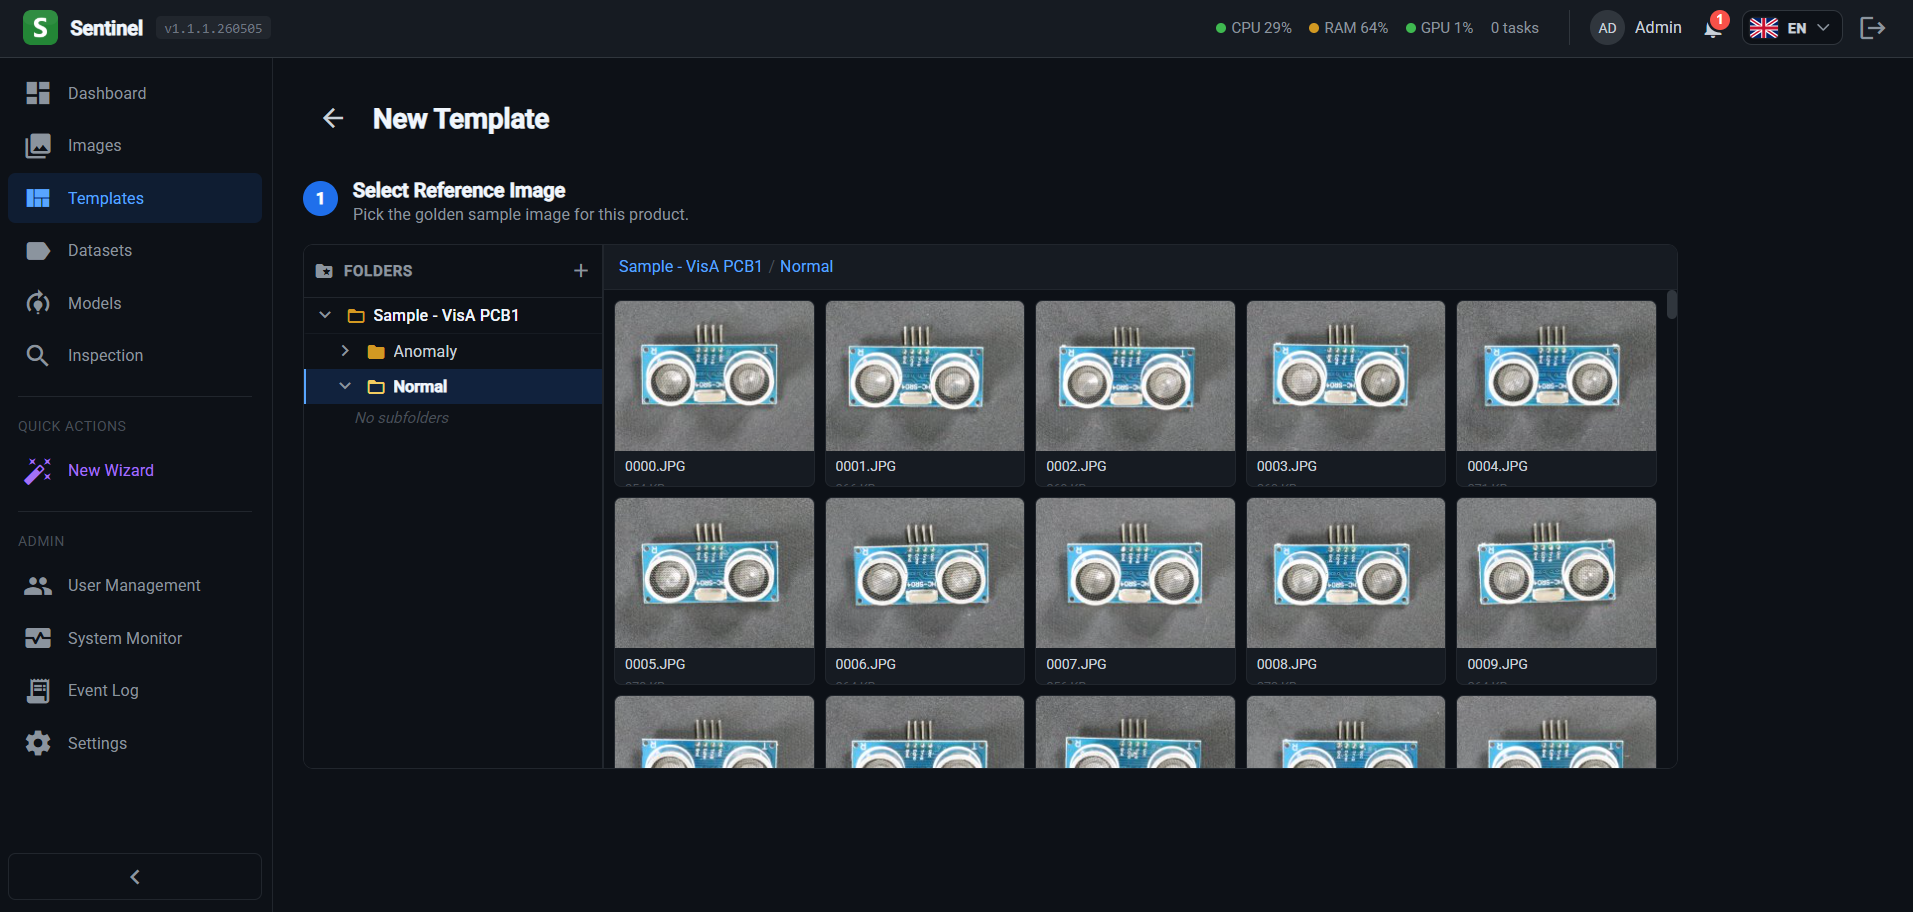
Create a template from a reference image
A template describes what a good product looks like and where on the image to look. Browse to a reference image — typically a known-good sample of your product — and the template wizard opens with the image loaded for ROI drawing.
- Pick any image from a registered image root
- Optional ORB feature alignment for products that shift between shots
- SAM-powered auto-segmentation for one-click region detection
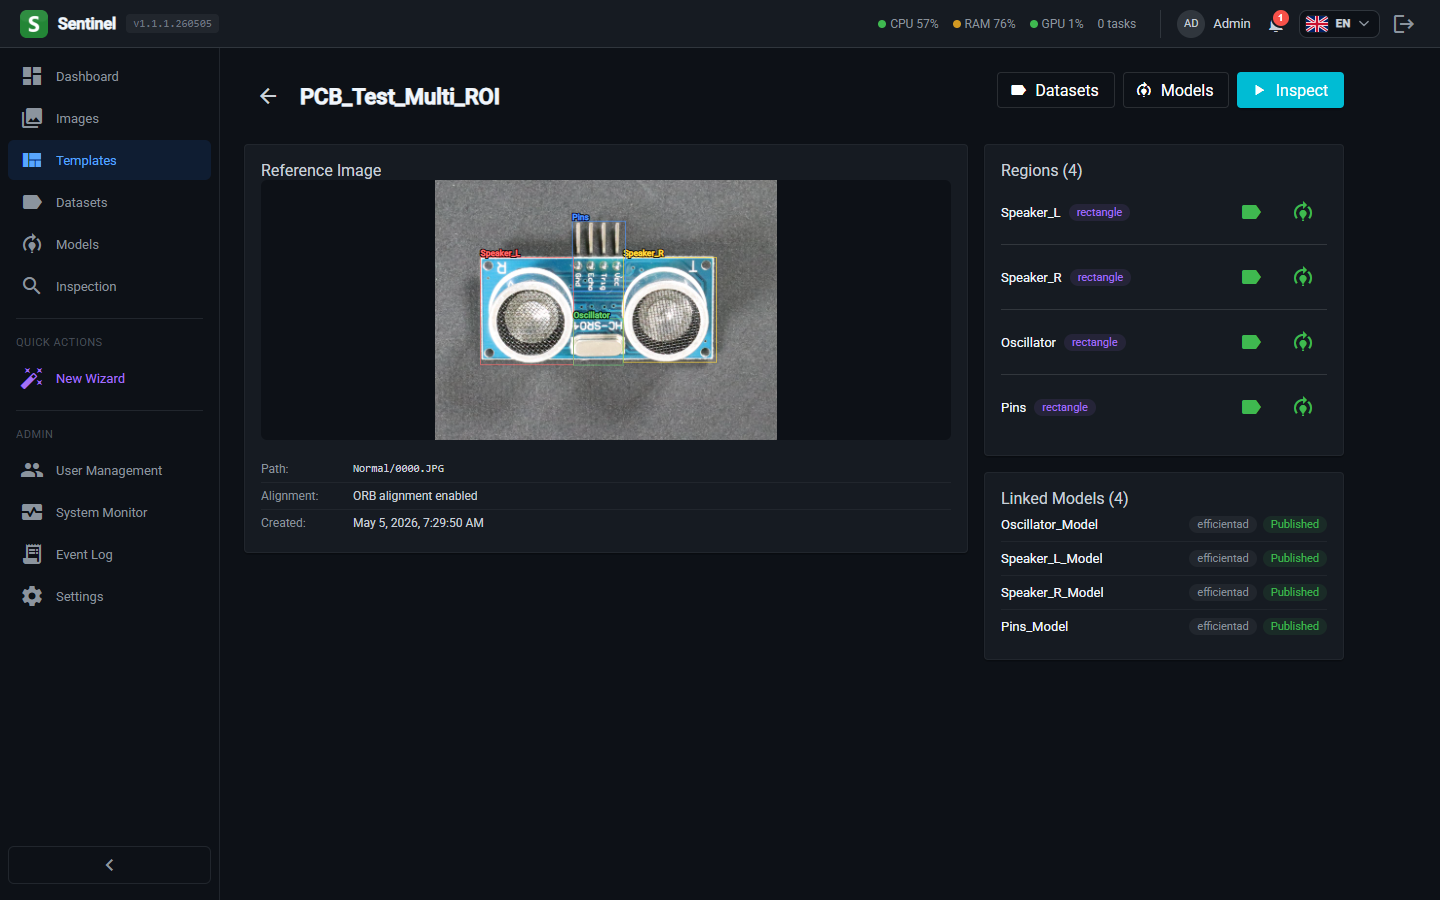
Draw regions of interest
Each region defines an area the AI will inspect — a solder pad, a connector, a label patch. Draw rectangles or polygons by clicking and dragging, or use Full Image to treat the entire frame as one region. Repeat regions can be tagged into a Region Group so a single trained model covers all members.
- Rectangle, polygon, or full-image ROIs
- Region Groups: train once, apply to many identical features
- Each ROI gets its own colour overlay and named entry in the side panel
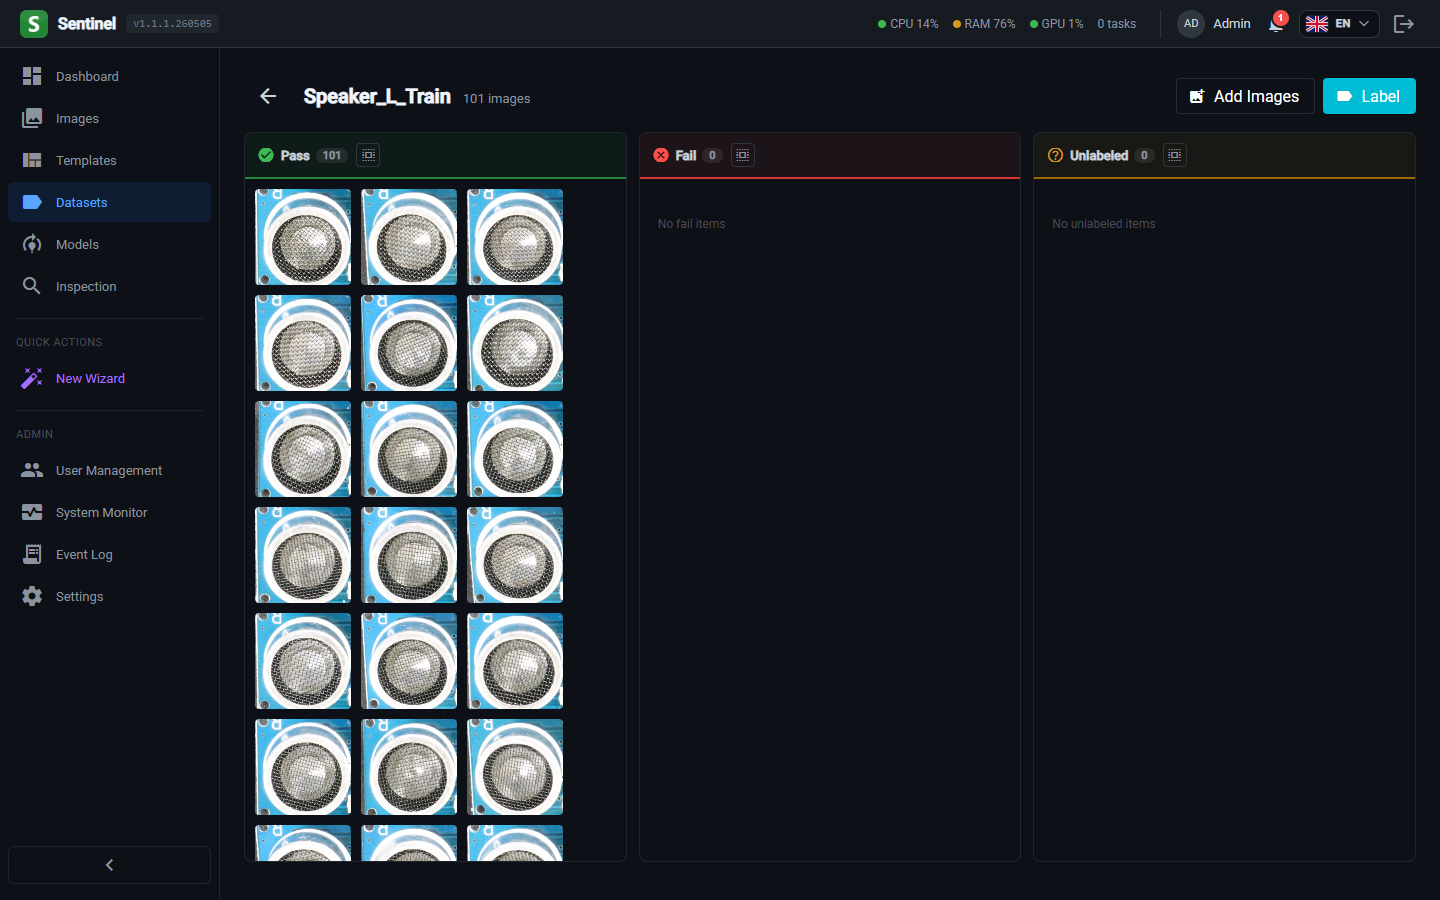
Build and label a dataset
Sentinel automatically aligns and crops each image to your region — a few seconds for 50 images. Label each crop Pass or Fail in a 3-column view (Unlabelled / Pass / Fail). For EfficientAD you only strictly need Pass labels; a small number of Fails are still useful for validation.
- Automatic alignment + crop pipeline runs in the background
- 3-column labeller with keyboard shortcuts (P = Pass, F = Fail)
- Best practice: build separate Training and Test datasets for the same region
Train a model
Pick the target region, choose the engine (EfficientAD recommended for unknown defect types), select your training dataset, and start training. Defaults are tuned to work out-of-the-box. Training runs in a sequential GPU queue — schedule for off-hours if needed.
- Engines: EfficientAD, Classifier, Autoencoder, YOLOv8 Detection
- Sequential training queue with drag-to-reorder
- Schedule training for a specific date and time

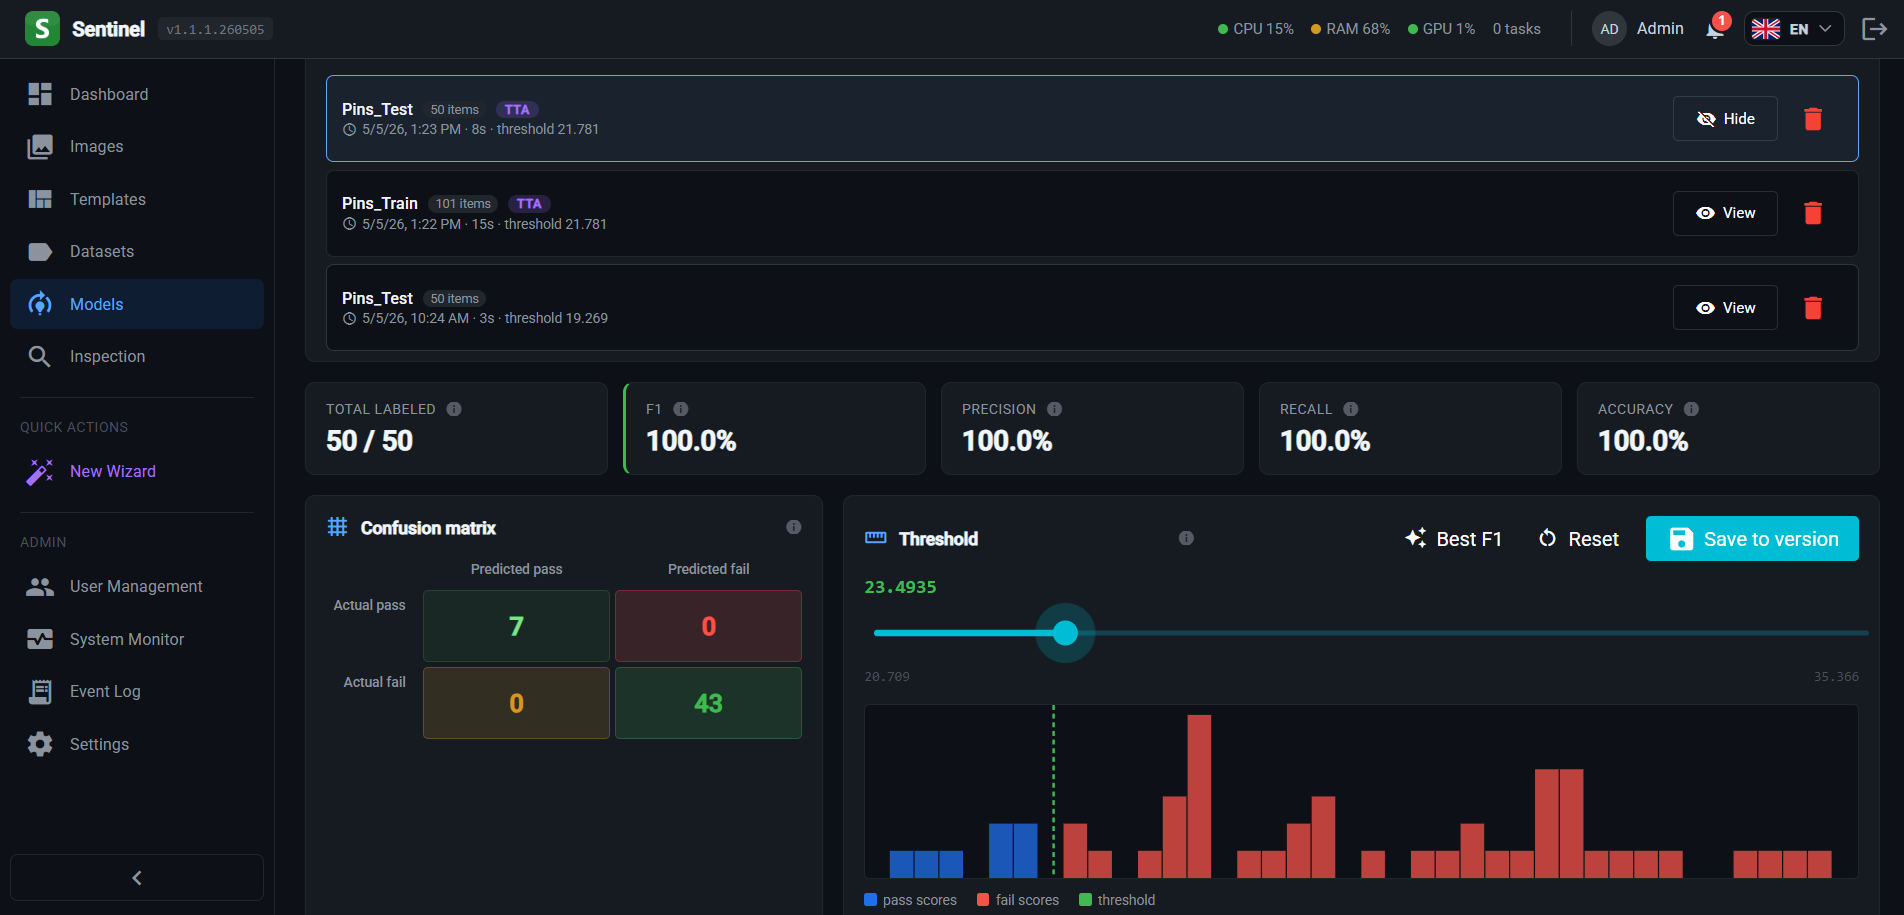
Validate on the Test Bench
Before publishing, evaluate the trained model against your test dataset — images the model hasn't seen. The bench shows every prediction with its actual label, sorted with errors first, plus pixel-level heatmaps highlighting exactly where the model thinks something is wrong.
- Side-by-side predicted vs. actual label view
- Live threshold tuning — see precision/recall update in real time
- One-click feedback: mark crops as Fail or exclude mislabelled images
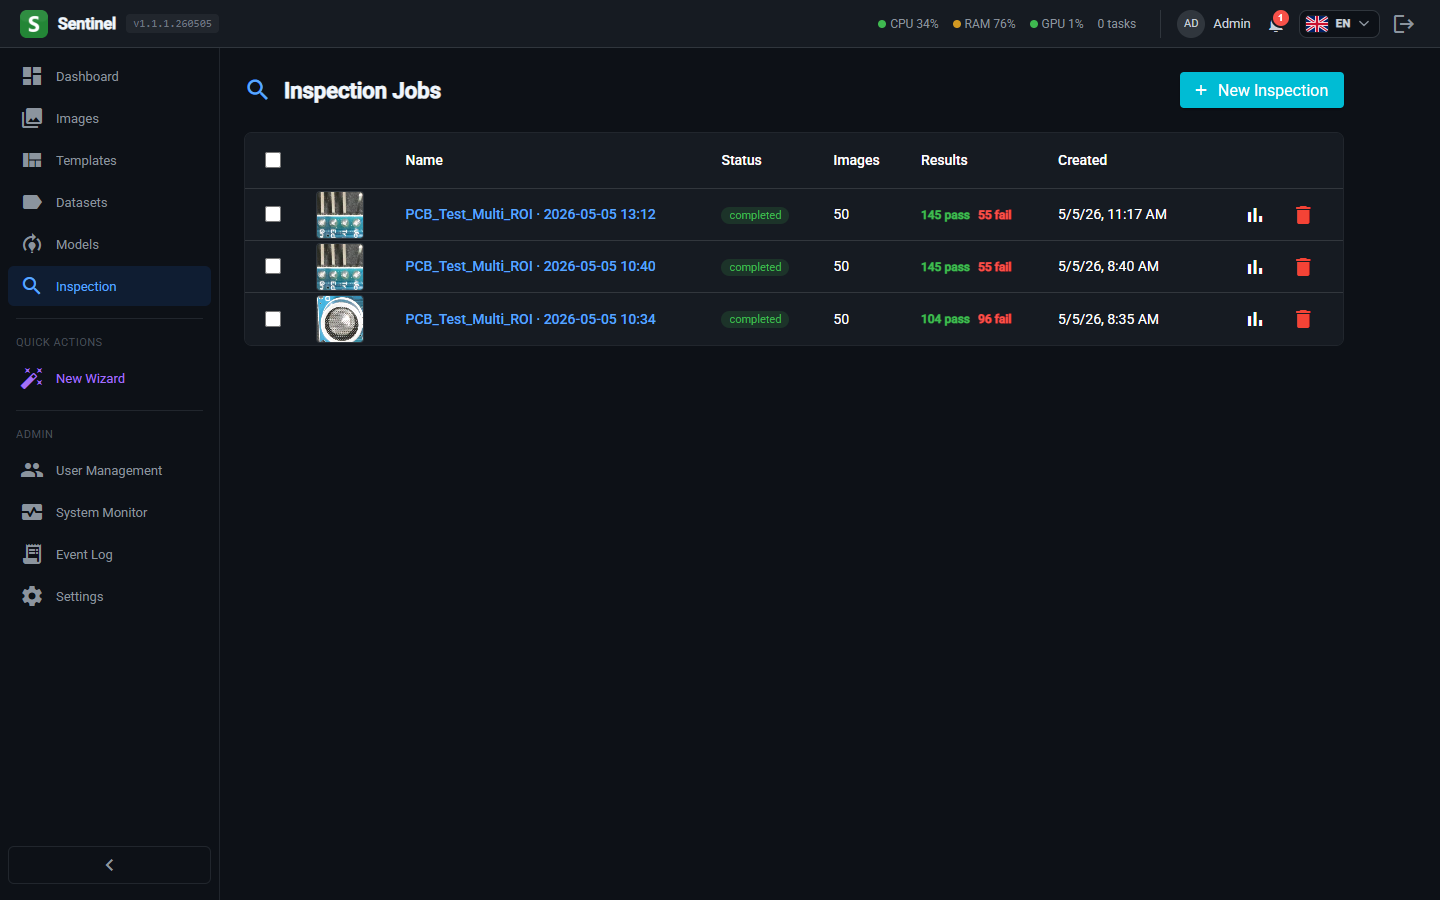
Run an inspection
Once you're happy with the metrics, activate and publish the model. From the Inspection page, pick your template, assign the published model to its region, and feed in a batch of new images. Sentinel aligns, crops, predicts, and stores results per image per region with confidence scores.
- Multi-model inspection runs every assigned model in parallel
- Real-time progress streaming via WebSocket
- Confirm / Dispute / Needs-Review feedback closes the training loop
Always split your data: Training + Test
Build two datasets per region with a roughly 70/30 split. Train on the first, validate on the second. The test bench's precision and recall numbers are only meaningful when the model hasn't already memorised the images — otherwise they look misleadingly perfect.
Ready to try it on your own products?
Schedule a personalised walkthrough — we'll set up Sentinel with your real production images and help build your first model live.